When it comes to epic subject matter, you can’t beat mother nature – and with the lightweight Mavic Pro from DJI, you can now grab awesome shots from the air during any holiday or trip to the great outdoors.
In this tutorial, we’re going to run through some of the funnest things you can do with this amazing little device.
“The Mavic’s camera can shoot super high quality 12 megapixel stills”
Let’s start with photography. The Mavic’s camera can shoot super high quality 12 megapixel stills. Just tap on the screen to focus, and hit the shutter on the top right of the controller.
** Find out more about the DJI Mavic Pro here **
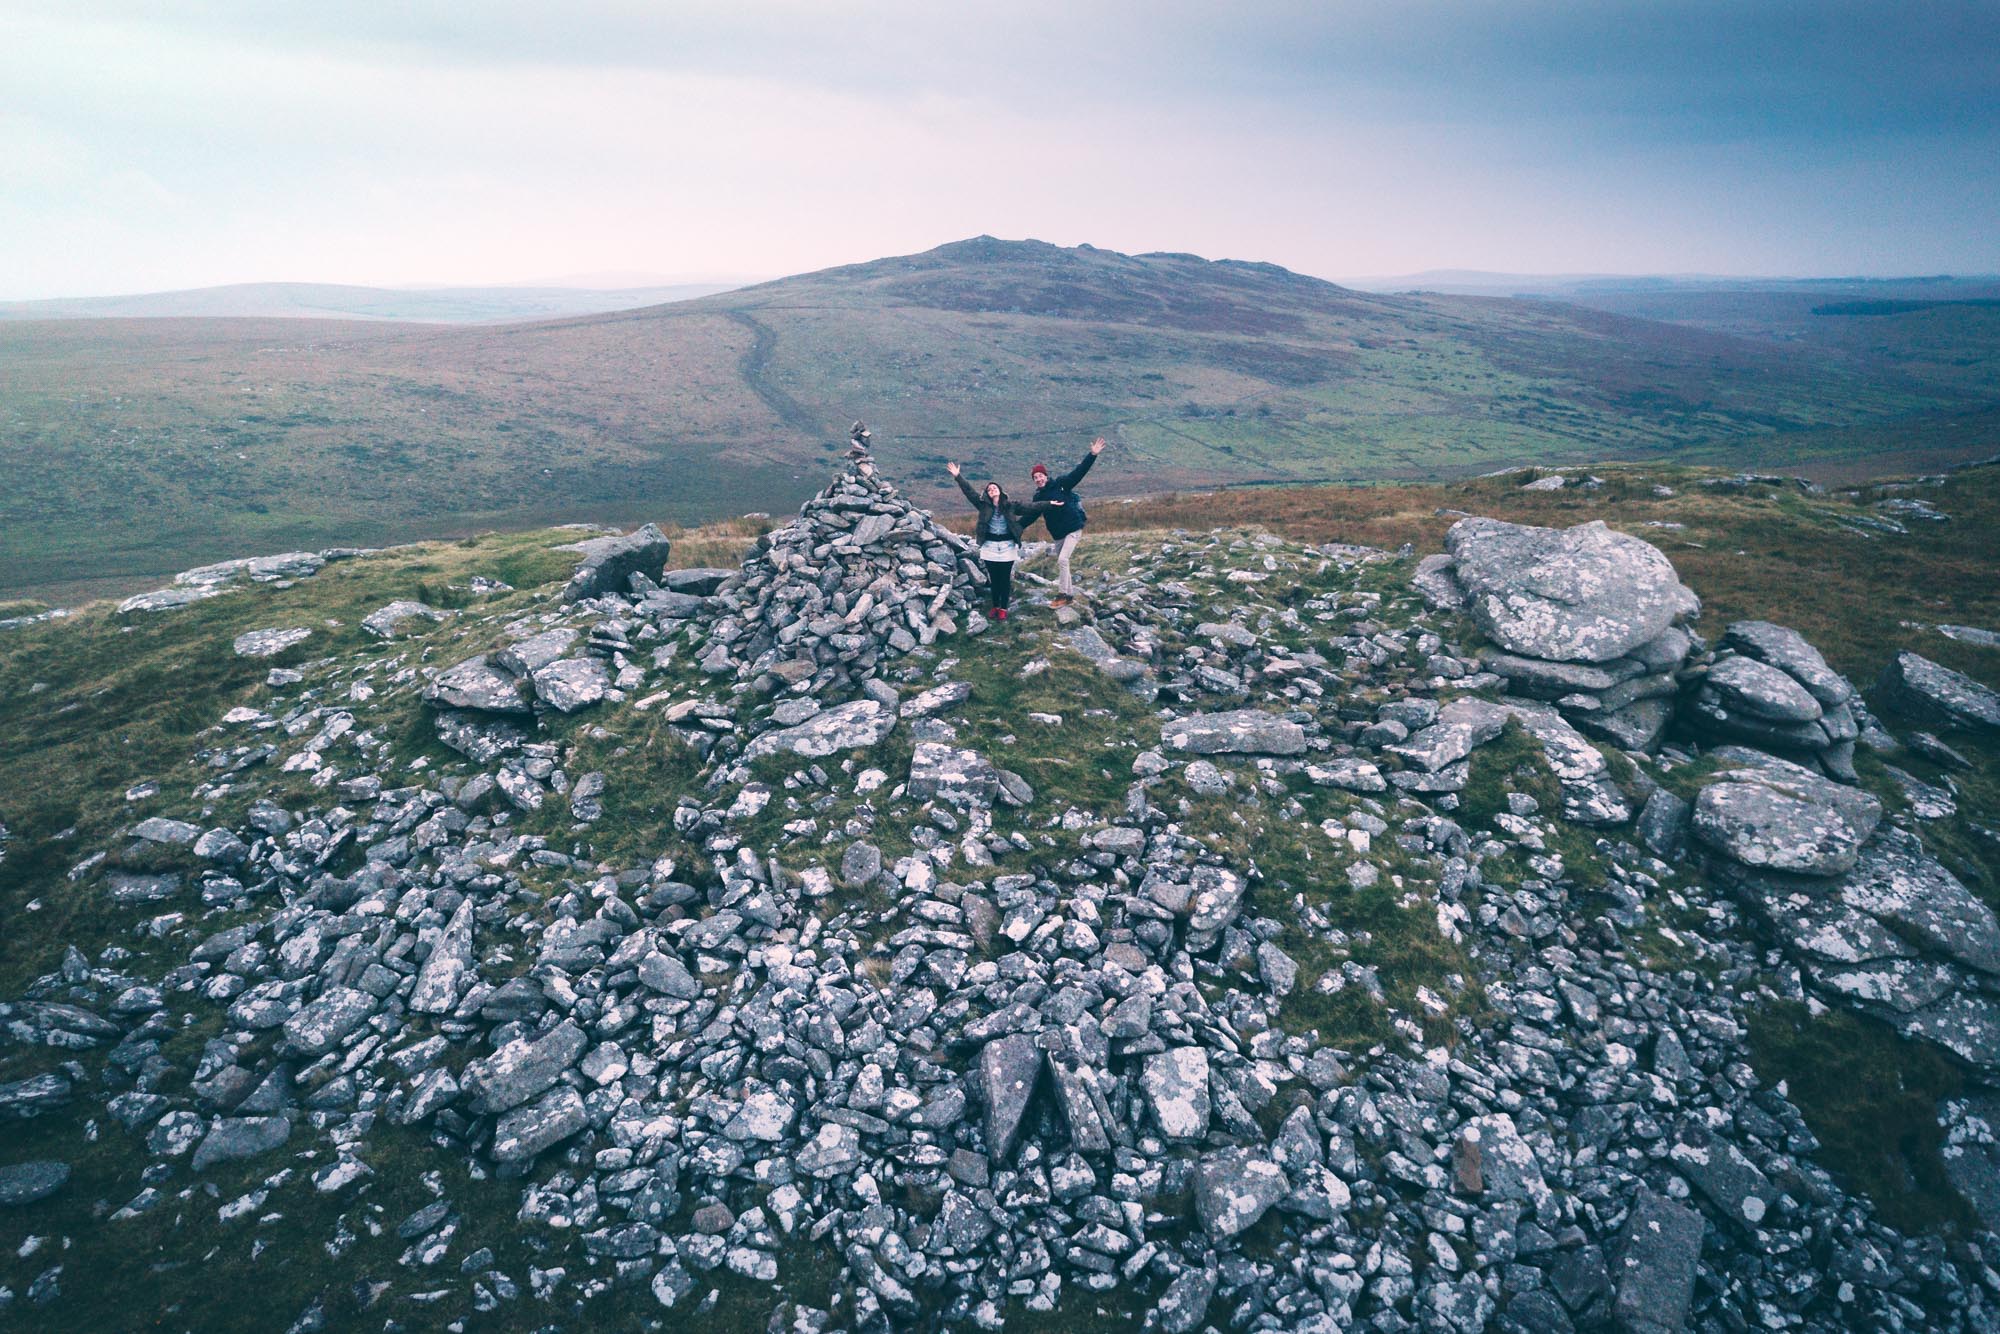
For the ultimate selfie, check out Gesture Mode. Pick a scenic spot, send your Mavic above you and spread your arms to get its attention. Then just signal to take a picture… and say cheese!
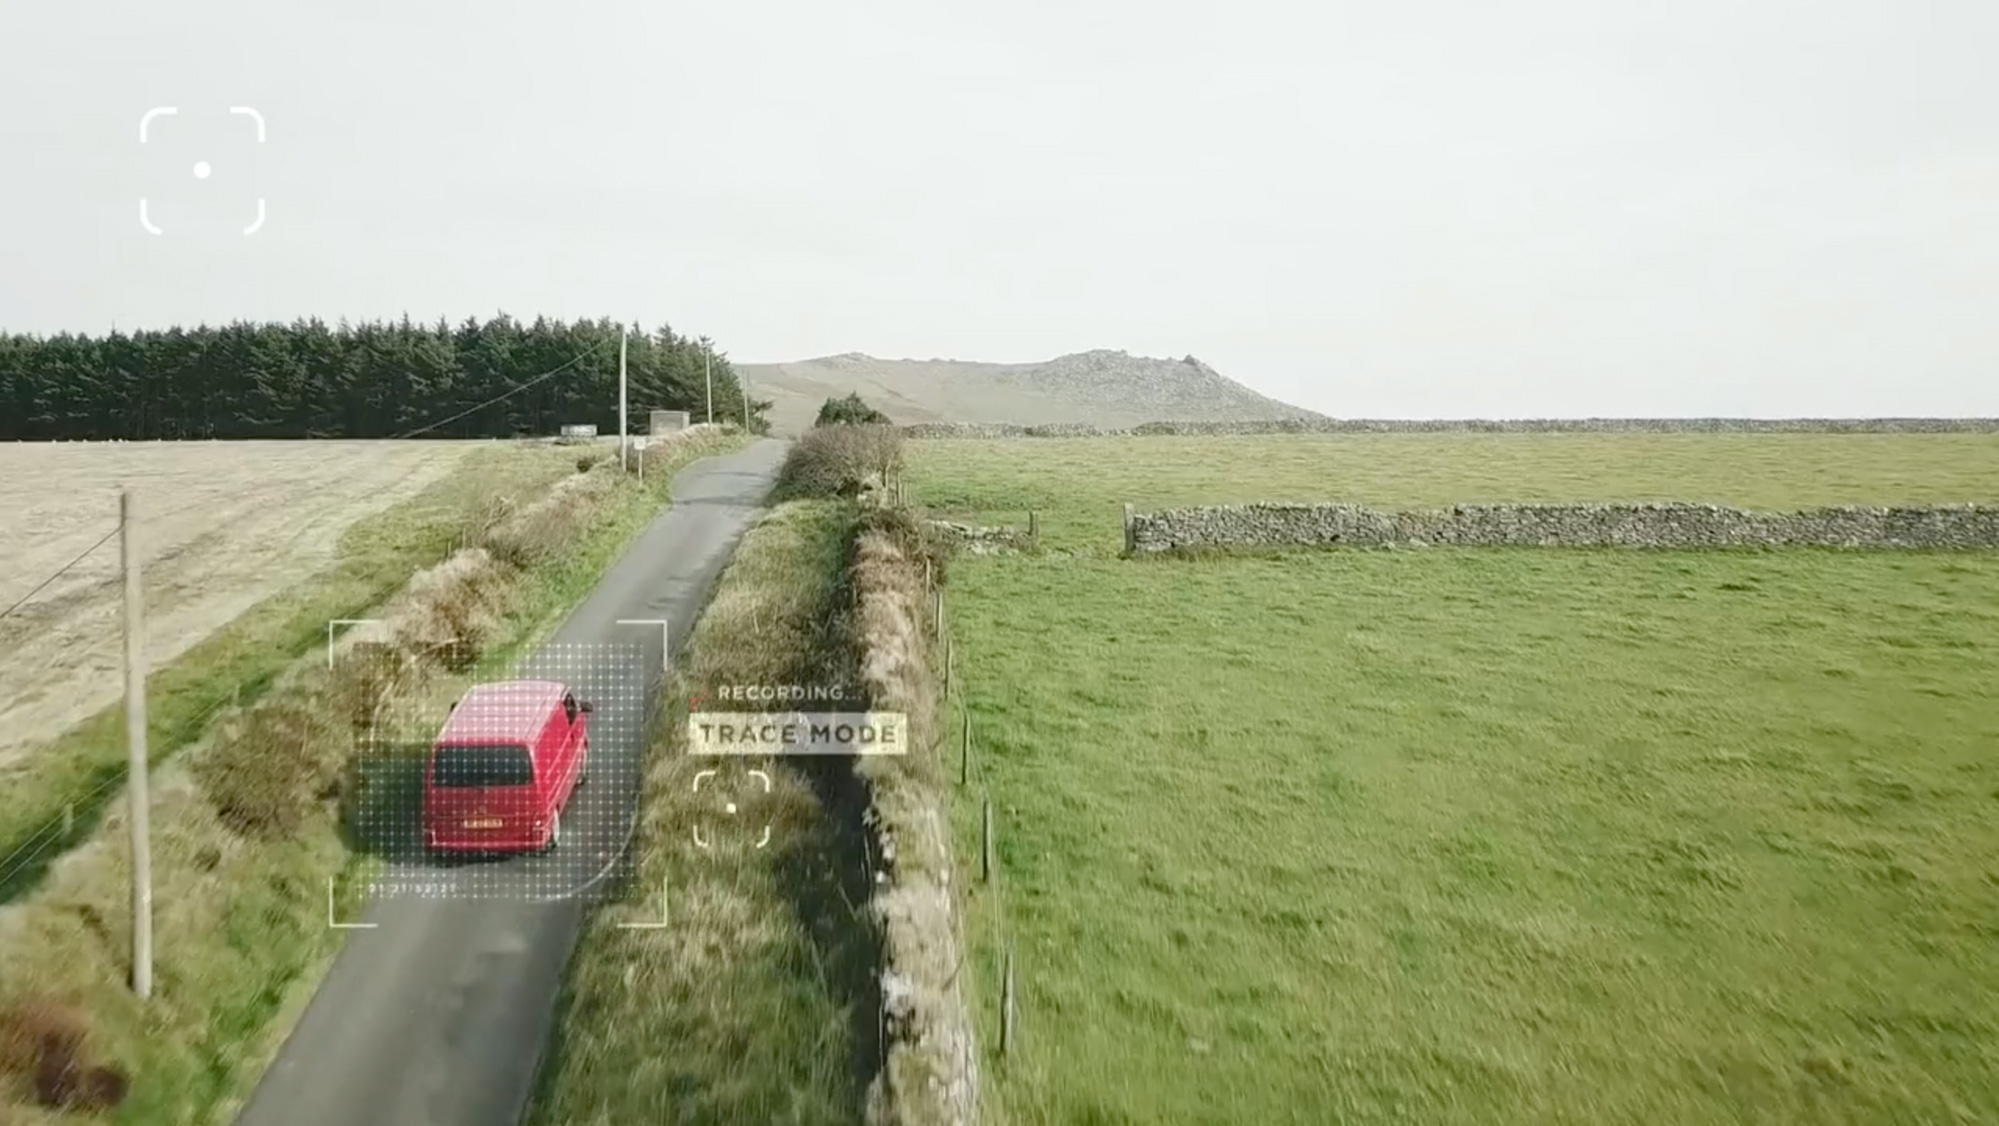
If you’re making a road trip video, you can set the scene by following your vehicle using Active Track – simply tap on the subject and the camera will lock on:
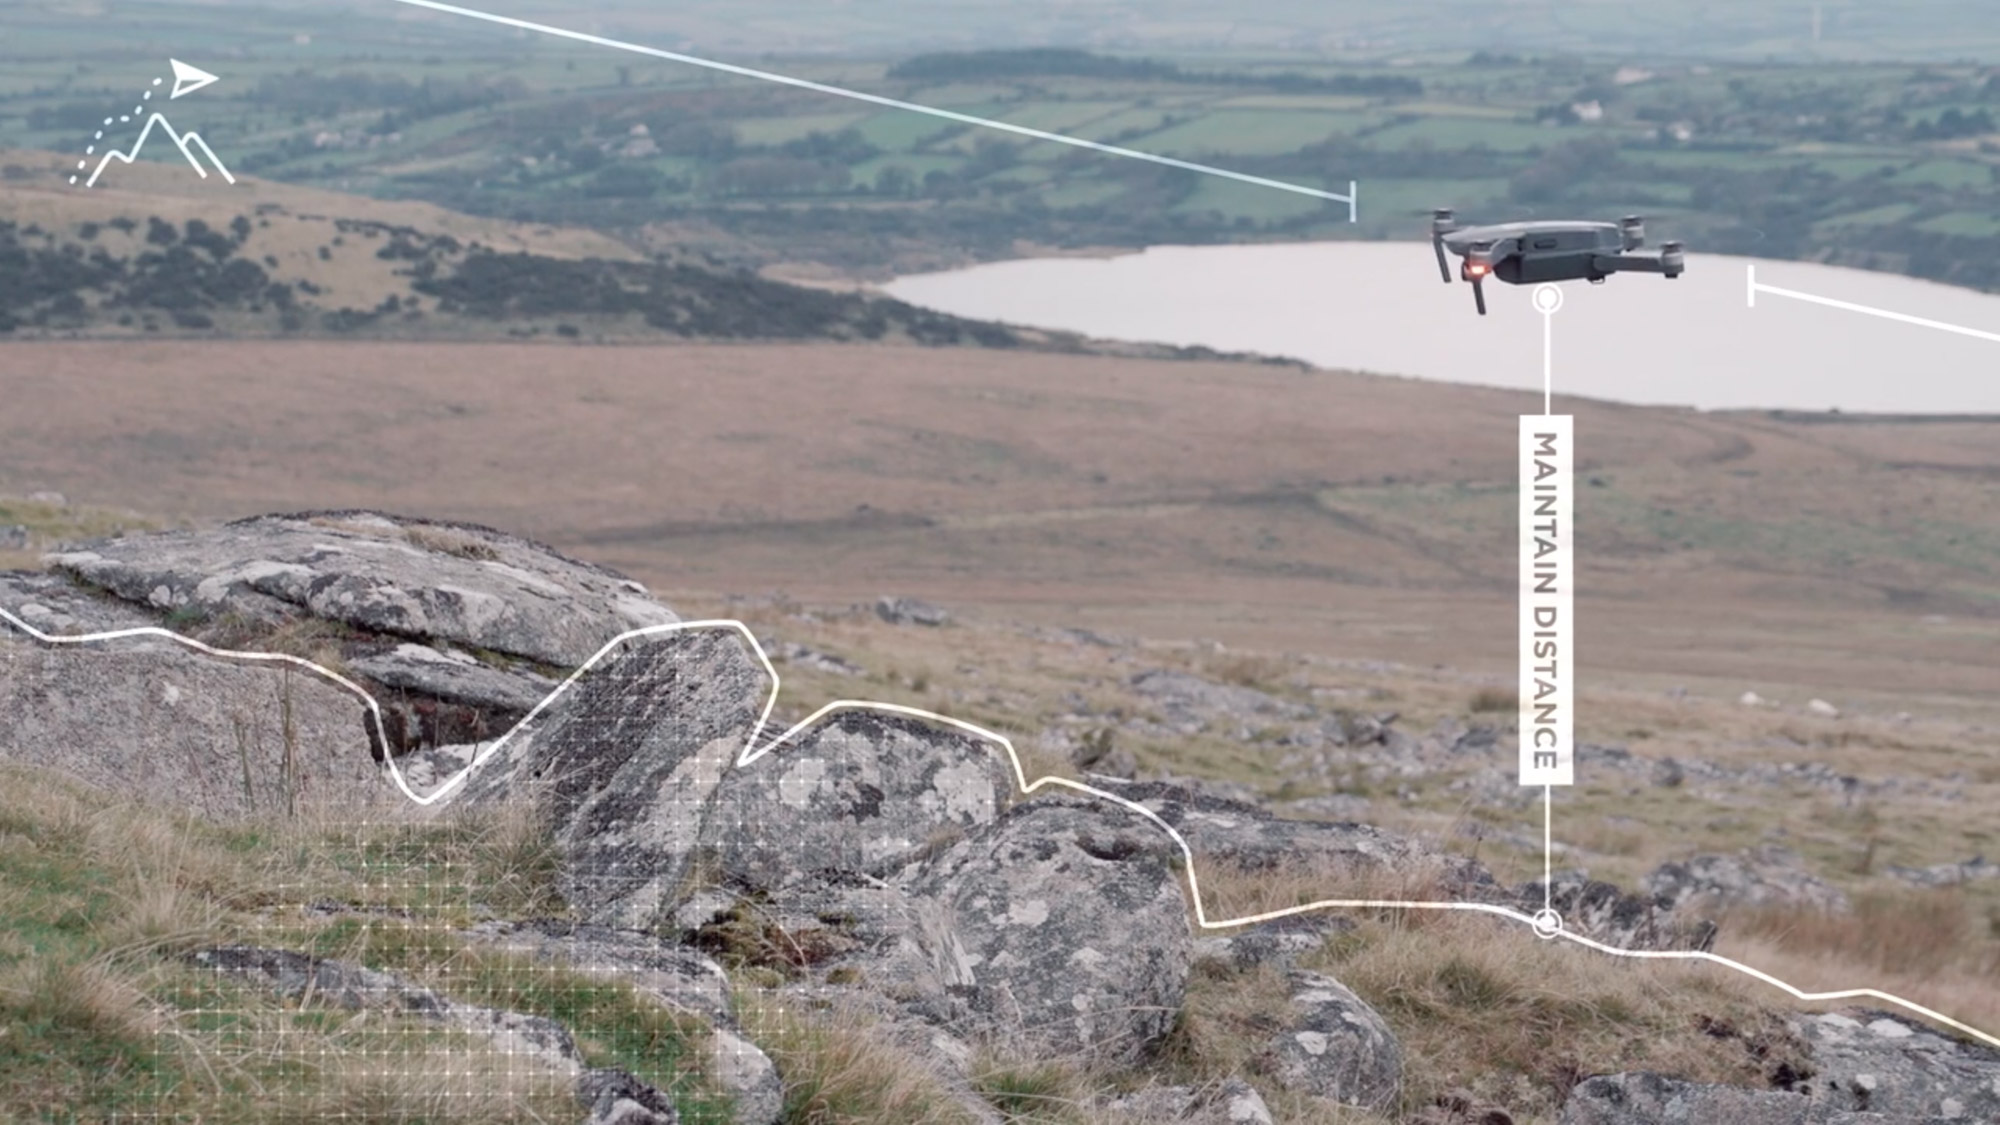
When hiking uphill, pressing Terrain Follow will keep the Mavic at a fixed height above the ground using its forward and downward sensors. No bumps, no scrapes – just smooth footage:
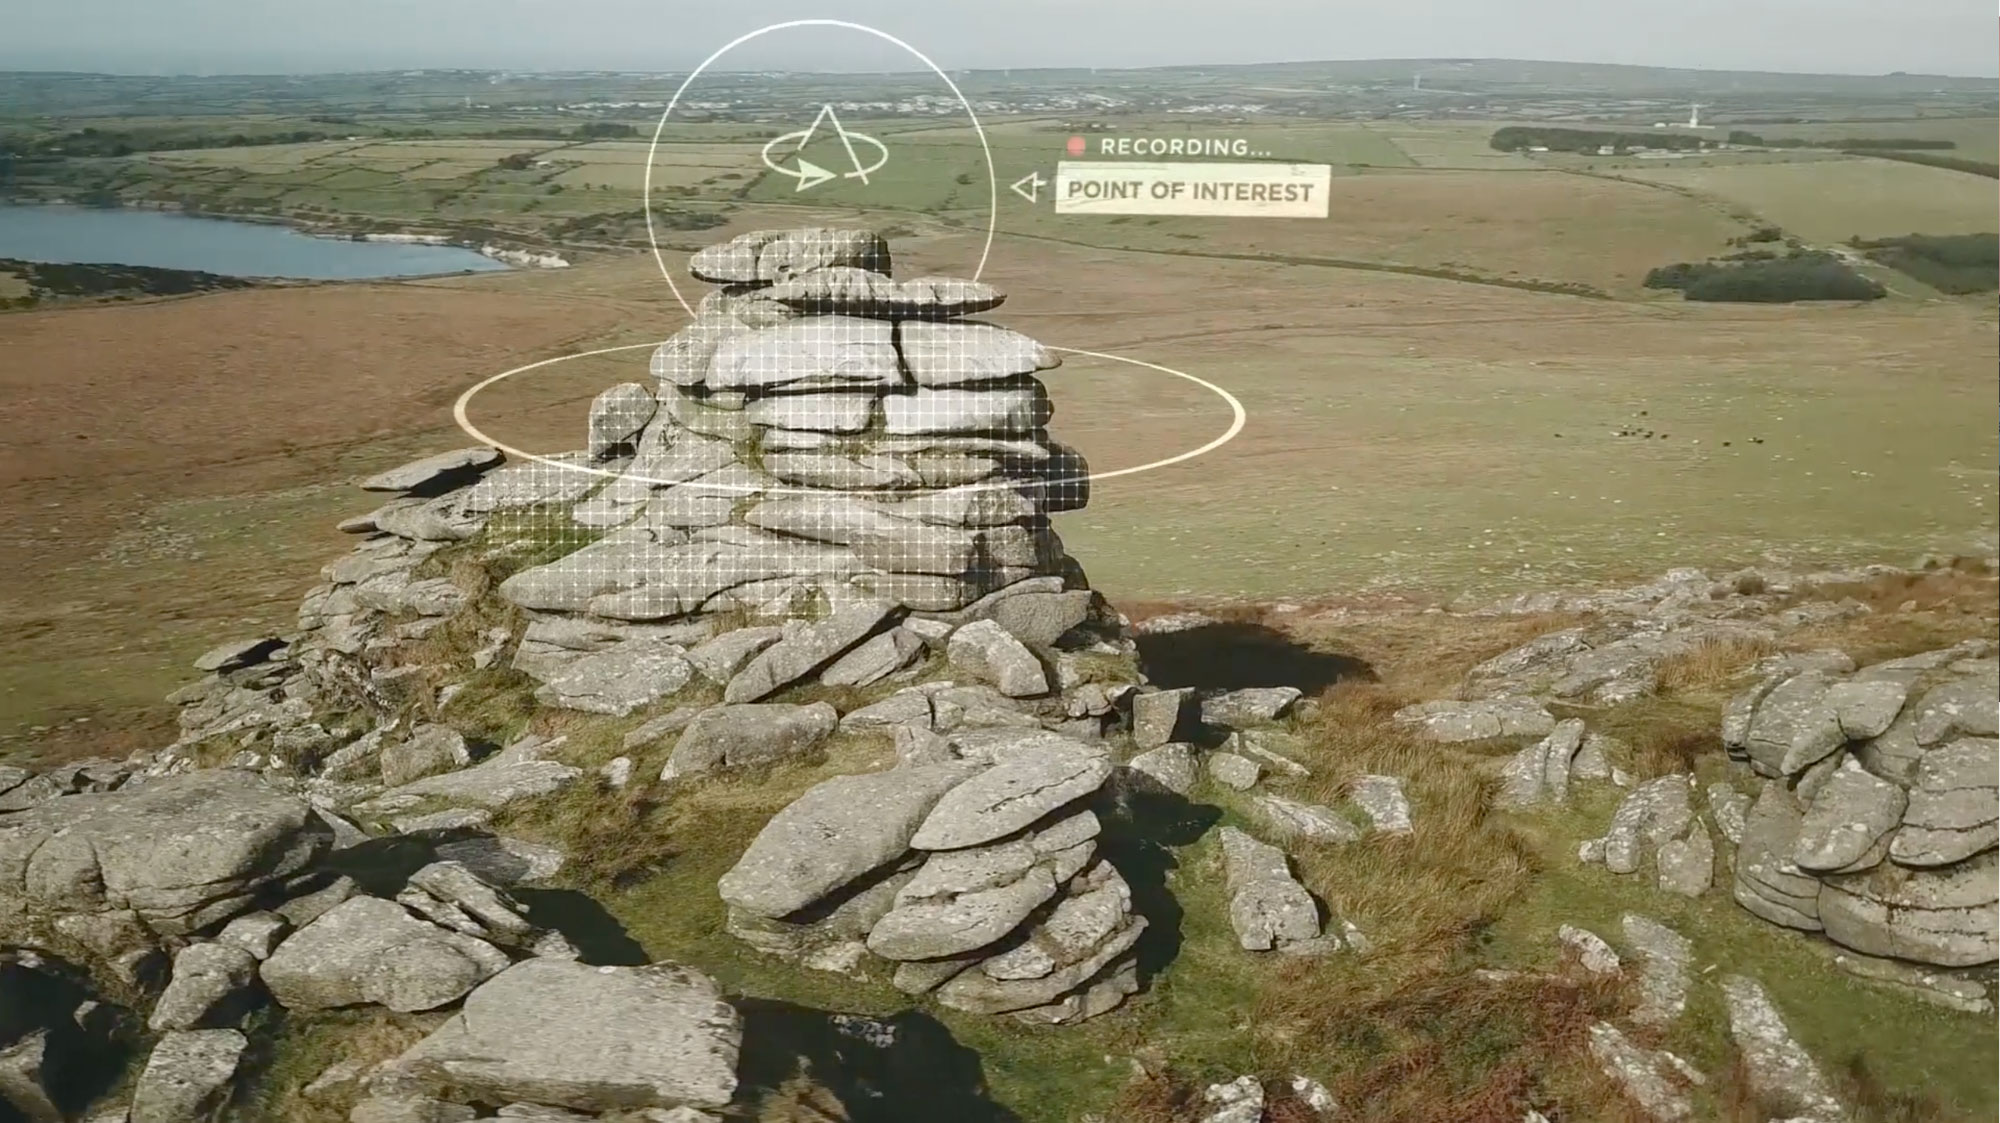
When you want to capture the whole scene, Point of Interest mode will automatically circle an area for an epic 360 panorama. First, hover directly over the subject and fix your centrepoint. Then, apply a radius:
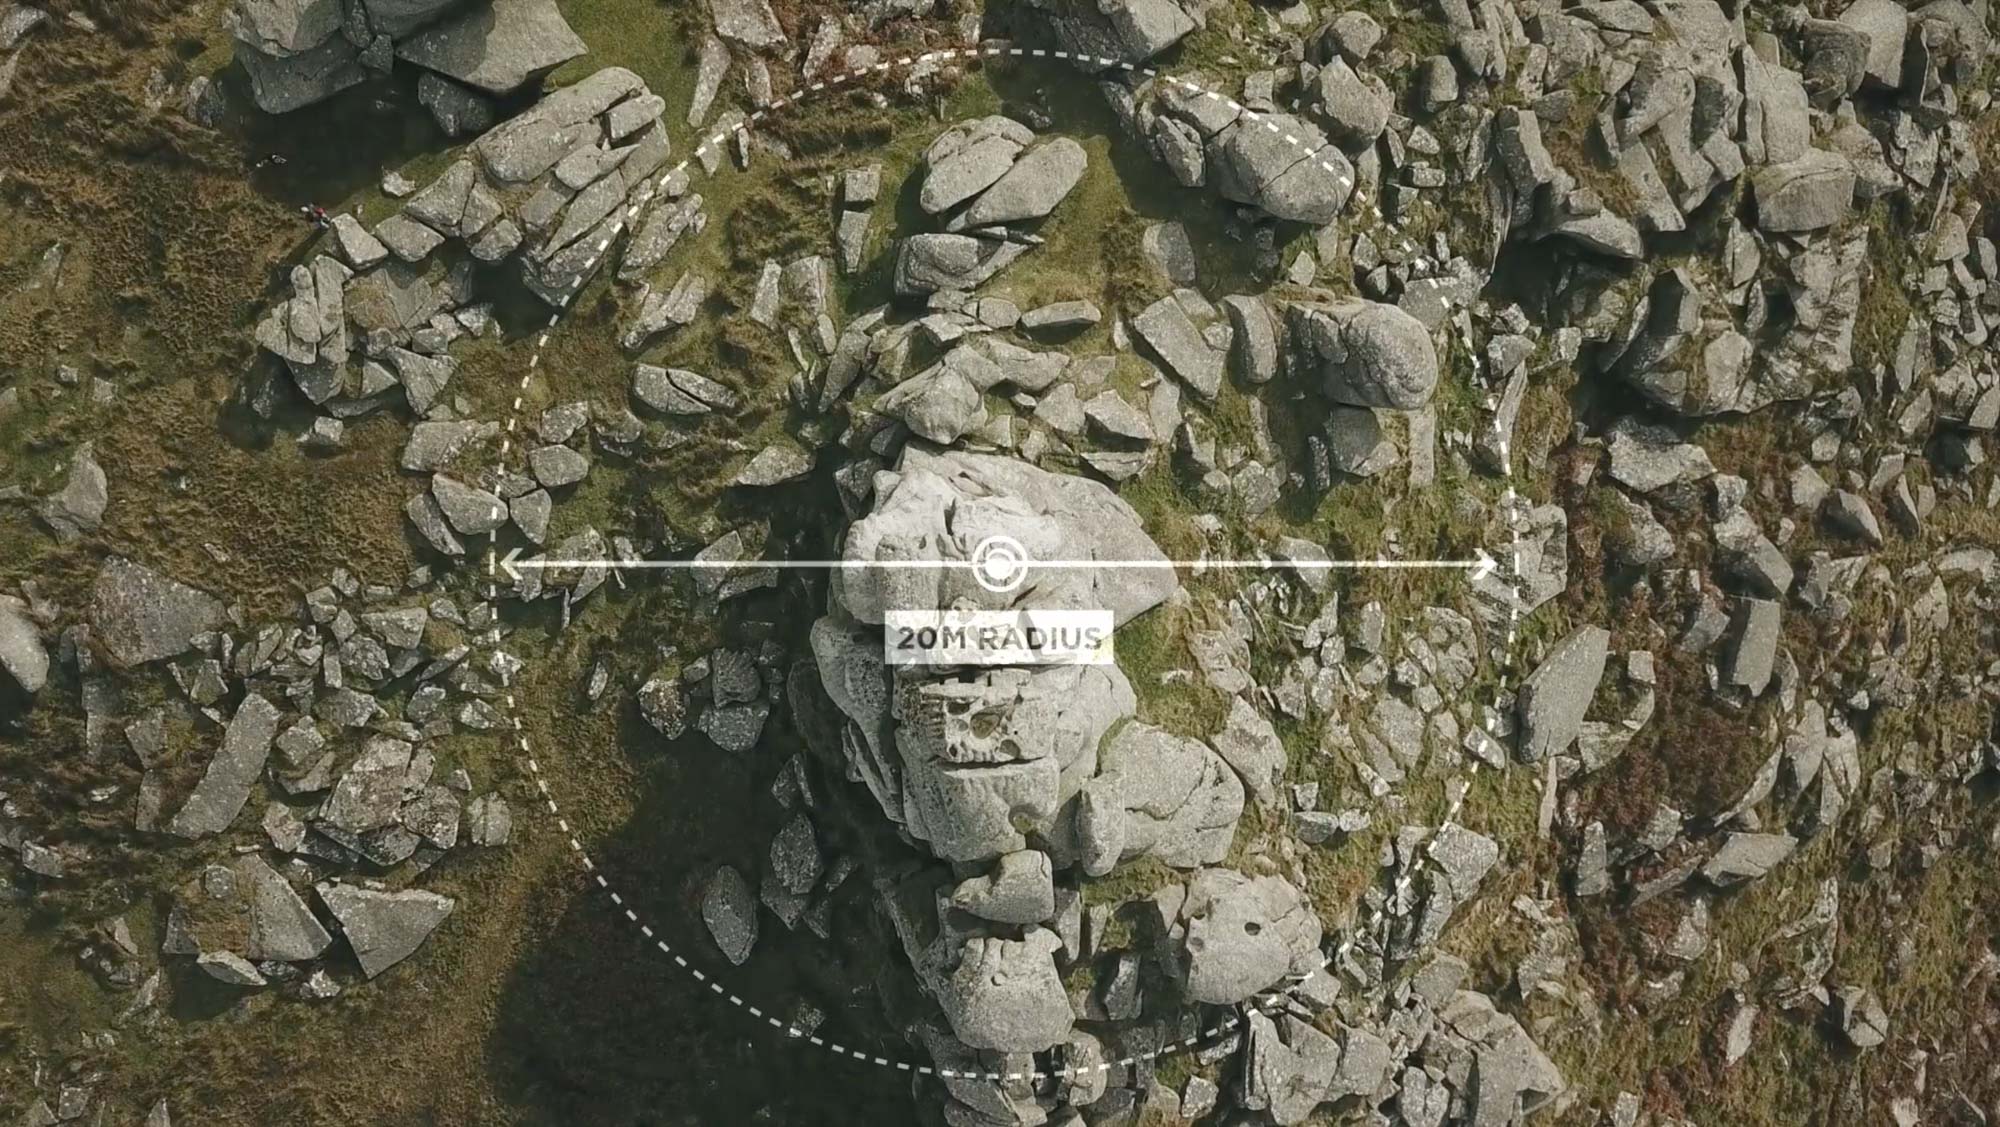
You can adjust the speed the drone will complete its orbit. Once you’re ready, just hit ‘Apply’ and it will begin:
When you’re done with shooting, the Mavic folds back down in a few seconds so you can easily stash it away, and carry on with your trip.
“Point of Interest mode will automatically circle an area for an epic 360 panorama”
Check back for the next tutorial, when we’ll be in the mountains, with some top tips on using the Mavic to shoot snowboarding.