Share

Mountain Biking

10 Sketchy Trailside Fixes that Every Mountain Biker Should Know

The last resort bike hacks for when things get desperate...

Photo: Shutterstock

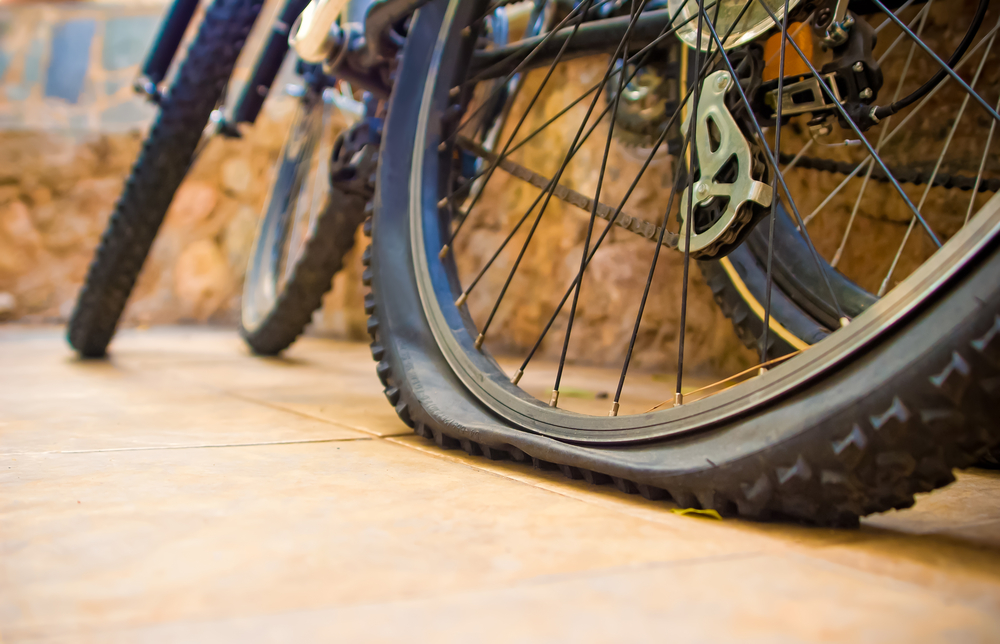
I’ve been riding mountain bikes for more than 25 years now, and in that time, i’ve managed to break a fair few of them. As is life, plenty of my breaks happened when I was out riding without the right tools to actually fix the problem.

Back in the day, before mobile phones, this was a real issue. You couldn’t simply phone a friend to come and pick you up. It was either try and bodge a repair or face a long walk home.

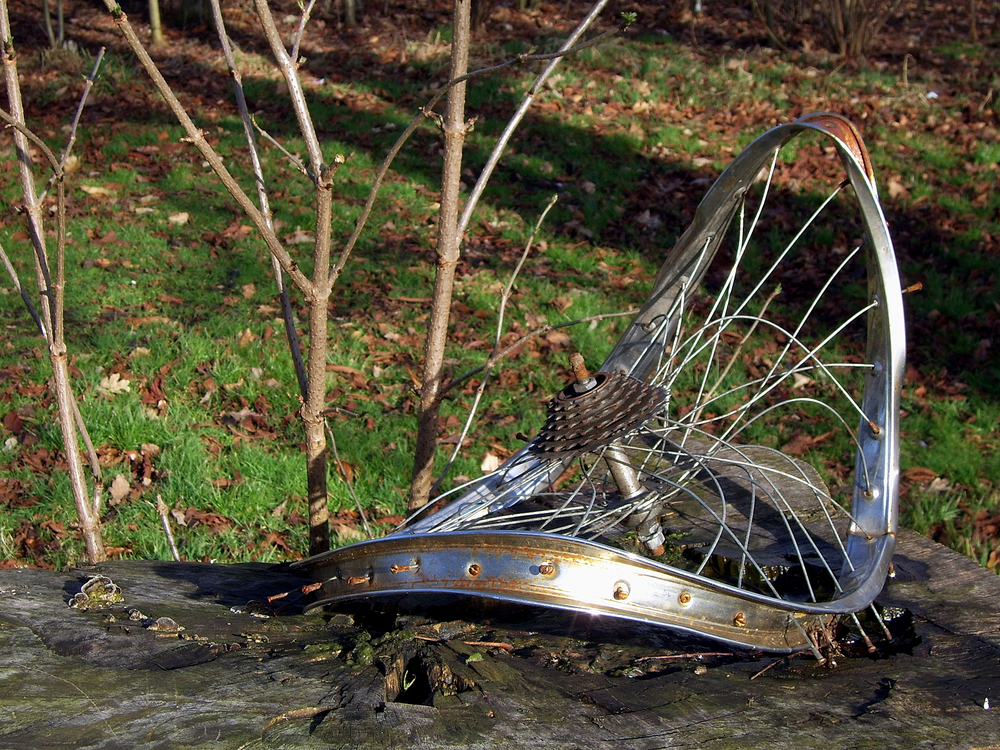
Here’s a collection of some of the weirdest and most wonderful ghetto fixes, from dry leaves and crisp packets to zip-wires and rocks… and yes, they are accompanied with the reasons why you should probably never give them a shot.

1) Fixing a Puncture With Knots

Photo: Shutterstock

The most common problem needing a trail side repair is the humble puncture. Less of a problem these days with sealant filled tubeless setups, but what happens if your inner tube tears and you’ve forgotten your puncture repair kit?

Well, Start by tearing the inner tube apart at the puncture site. Tear across the tube so you’ve got one long piece of rubber instead of a ring and then tie a knot in each of the open ends, stuff the tube back in the tyre and pump it up. Now hope and pray that it holds air long enough to get you back to civilisation.

2) Fixing a Puncture With Dried Leaves and Grass

Photo: Shutterstock

So what happens if you’ve torn the valve out of the inner tube? Bodge lore suggests stuffing the tyres with dried leaves and grass so you can ride home.

Where do I start with this one? Do you have any idea how much green material it takes to fill a two-inch tyre?

Secondly, try riding on a tyre filled with leaves and you may as well simply ride on a flat tyre, the feeling is about the same. Don’t ask me how I know these two facts. I just know.

3) Patching a Tyre With a Crisp Packet

Photo: Shutterstock

A holed tyre is an issue in today’s world of tubeless options. While you can buy tyre patches to fix the hole, who carries one on regular rides?

Ghetto wisdom suggests a crisp packet or similar shoved inside the tyre will hold once you get the inner tube pumped up. This assumes you’ve got a spare tube or can borrow one.

Then again where’d you get a crisp packet from on the trail? While this bodge might get you home, there’s a real possibility the ‘patch’ will keep blowing out through the hole in the tyre as you’re trying to ride, so you’ll just end up walking anyway.

4) Joining a Broken Chain With a Piece of Wire

Photo: Shutterstock

I broke a chain once. That was a long walk home because the only tools I had with me in those days were some tyre levers.

Now, I always carry a chain tool so I can remove the broken link and re-join the chain. However, at the time an acquaintance was totally convinced that, had he been out with me, he could have fixed my broken chain with nothing more than a bit of bent wire.

His theory was that a short piece of wire could be bent through the links of the chain to join it. Unfortunately, his plan would have relied on having a suitable piece of wire, and given the amount of torque that goes through a chain, the repair would doubtless have failed – something I’ve tried and failed to explain to him countless times.

5) Replacing Lost or Broken Bolts With Zip-Ties

Photo: Shutterstock

If you’re sensible enough to carry a puncture repair outfit then you might be carrying some zip-ties as well, just in case you need them.

The big question is though, what the hell do you do with them? Having broken the head of a seat post once, I used a couple of zip-ties to hold the seat in place. It was either that or ride home with no saddle, and a friend had once completed a ride with three missing chain-ring bolts replaced by zip-ties.

In fact, I’d go as far as to say that zip-ties are probably the only get-you-home-bodge that I have any faith in.

6) Using Toe Straps to Fix a Loose Headset

Photo: Shutterstock

This is another one from ‘back in the day’. Up until the mid-90s, when headsets became the norm, headset bearings were all held in place by two oversized nuts.

These things were so big you need a pair of 32mm spanners to do any work on them. This was also a time before suspension was affordable, so bikes took a lot more abuse. This meant that headsets would frequently work loose.

Now, being a tool geek, I had the Cool Tool accessory spanners for proper trailside adjustments, but I once witnessed a rider take the leather toe straps from his pedals (this was a time before clipless pedals) and wrap them around the headset nuts to try and tighten them up. Success, as you might imagine, was fairly limited.

7) Using a Branch to Hold Your Bars Together

Photo: Shutterstock

I’ve had plenty of big crashes on mountain bikes and I’m unfortunate enough to have the scars to prove it.

Luckily, however, I’ve always managed not to completely trash the bike in the process. Some people are not so fortunate and while they walk away, their bikes don’t always escape serious damage.

Zip ties are probably the only get-you-home-bodge that I actually have any faith in…

In a time before handlebars got wide and curvy, everyone rode straight bars and lots of them were scary lightweight, too. That meant one big crash was all it took to break them.

More often than not the bars would break right next to the stem, leaving the owner the choice of walking home, riding with just one hand, or bodging the bars back together. I’ve seen a length of branch wedged in each piece of broken bar to hold them and also various bits of branch zip-tied around the two pieces in order to avoid a walk home.

Personally, if I’d crashed hard enough to break a pair of bars, I’d definitely take the walk.

8) Straightening a Wheel… With Brute Force

Photo: Shutterstock

If you crashed hard enough to break your handlebars, you’re still capable of rational thought, and you’re considering riding home, the next thing to worry about will be the state of your wheels.

A crash that hard will probably have left your front wheel looking like a Pringle. It doesn’t matter how good you are with a spoke key, there’s no way you’ll ever get it running true again, so getting brutal on it in order to get home doesn’t seem like a bad idea.

The less violent way of straightening a pretzeled wheel is to lean it against a tree and press on the edges of it at the 3 and 9 o’clock positions.

With a bit of luck, you’ll get it straight enough for it to pass through the bike’s forks so can you ride again.

The worst case scenario involves laying the wheel on the ground and jumping on it. Of course, this could go badly wrong and completely trash the wheel.

Still, it’s a good way to relieve the stress, anger and frustration you’ve no doubt built up after being stupid enough to crash so hard in the first place.

9) Putting Cranks Back on With A Rock

Photo: Shutterstock

This is another one that is less likely to happen these days as square taper cranks go the same way as threaded headsets.

When square taper was the industry standard the cranks were a friction fit on the bottom bracket axle with a bolt to keep it in place. However, it was not uncommon for the bolt to work loose and fall out.

The ‘fix’ here involved putting the crank on the bottom bracket axle and then hitting it as hard as possible with the biggest rock you could find…

If this happened, the cranks would work themselves loose and then fall off. Once this happened, unless you could find the bolt and you had a suitable tool, you had the choice of walking home, riding home with one pedal if the non-drive side crank was the one that fell off or… you guessed it… bodging it!

The ‘fix’ here involved putting the crank on the bottom bracket axle and then hitting it as hard as possible with the biggest rock you could find. If you were lucky it would hold long enough for you to ride home.

You could then buy a new crank and bottom bracket to replace the ones you’d just wrecked.

10) Bodging a Gear Cable

Photo: Shutterstock

Cables snap. It’s a simple yet upsetting fact of life. If it’s a brake cable then it’s time to ride home slowly. However, if it’s a gear cable there’s a bodge that can give you some gears back.

If it’s the front derailleur cable that snapped then just adjust the mech to keep the chain on the middle ring. If it’s the rear gear cable you need to remove the front cable inner.

Now take the broken rear inner out of the shifter and replace it with that front cable. This can then be twisted around the remains of the snapped cable from the derailleur to give you a “workable” shifter/mech. Don’t expect the shifts to be fully indexed, but, hey, it’s better than no gears or a long walk home. Right?

You May Also Like:

8 Types Of Mountain Biker You’re Bound To Meet On The Trail

10 Mountain Bike Inventions That Seemed Like A Good Idea At The Time

Share

Newsletter Terms & Conditions

Please enter your email so we can keep you updated with news, features and the latest offers. If you are not interested you can unsubscribe at any time. We will never sell your data and you'll only get messages from us and our partners whose products and services we think you'll enjoy.

Read our full Privacy Policy as well as Terms & Conditions.

production