Rock Climbing & Abseiling Equipment | 10 Pieces Of Gear You Should Own
From ropes to carabiners, everything you need to abseil and climb
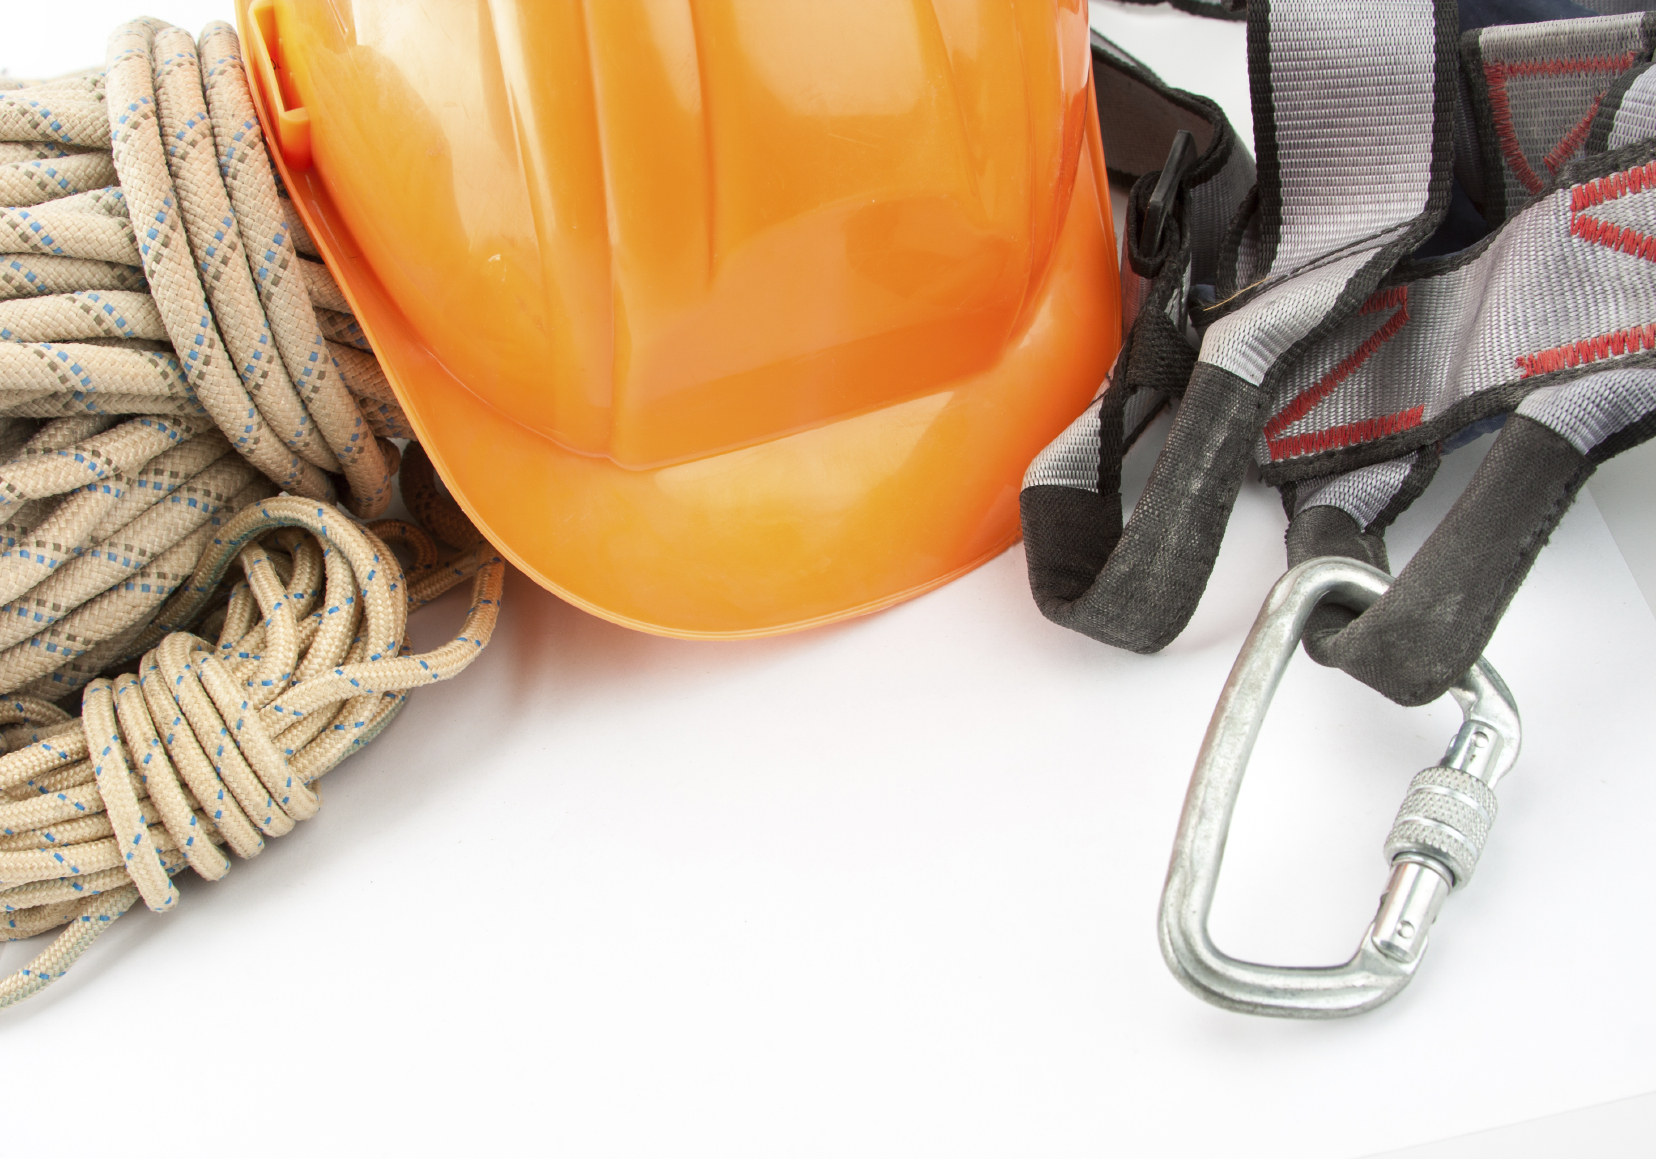
If you’re abseiling or rock climbing it’s important to make sure that you’ve got all the gear you need to make that a fun and, most importantly, safe experience.
From climbing ropes to belay devices, here’s your run down of 10 pieces of abseiling equipment that every rock climber and abseiler should have.
1) Rope
Photo: pixabay.com
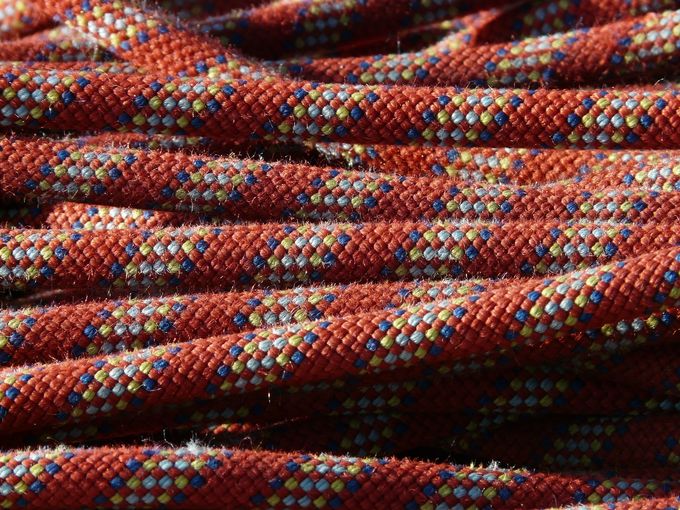
The most important piece of equipment for any abseil is a rope. Using the right abseiling techniques you can manage to abseil without a lot of things, including a harness, but the one piece of kit every successful climber (and abseiler) needs is a good quality climbing rope.
What to look for
The first thing you need to know about rope is how dynamic it is. The best climbing ropes are the most dynamic climbing ropes is one that will stretch if you fall onto it, taking some of the shock and impact out of any slip while you abseil – and making it more comfortable if you fall while climbing.
If you are only going to abseil you may choose a static rope which will not stretch at all and gives you less bounce as you descend, but at some point most abseilers will also climb so for the added comfort and versatility it is a good idea to get a dynamic rope.
The next thing on your rope check list should be the rope’s thickness. Regular climbing ropes vary from around 8mm up to 11.5mm. Thinner ropes are easier to carry and run more quickly through belay devices while thicker ropes are heavier but will often last longer and will cause more friction, running slower through belay devices and making it easier to control your speed.
It’s important when choosing any rope to make sure that it works well with your belay device first, being thick enough to cause friction in the device but not so thick that it’s hard to move or jerks when you’re abseiling. If you’re going up you’ll also appreciate this any time you fall off the climbing wall.
When a rope gets wet the nylon fibres in it contract, shortening the rope and reducing it’s dynamic qualities. If you’re really unlucky a rope can even freeze in extreme conditions, making it very difficult to use.
There are lots of different dry treatments available but if you can find one that treats both the outside of the rope (the sheath) and the inside (the core) that should give you the best dry protection possible.
The last thing you need to decide about your rope is how long it should be. It might sound obvious but you need a rope that is longer than the drop you are trying to abseil.
If you are planning to simply abseil you will only need enough rope to cover the distance once with some spare for tying off, but if you are planning to climb up and then abseil down a surface you will need twice the length of rope because it will need to stretch from the floor to the top and then give you enough spare rope to make it back down again.
This means that for a 20 meter climb you will need at least a 40m rope to complete your abseil.
Photo: pixabay com
The length of rope you need to start out with will depend on where you are planning to use it. If you are just going to abseil indoors at climbing walls around 40 meters should do the trick. For your first outdoor climbs 50m is a good starting point and when you are getting serious abseiling big drops 60m or more is the way to go.
Where and how much?
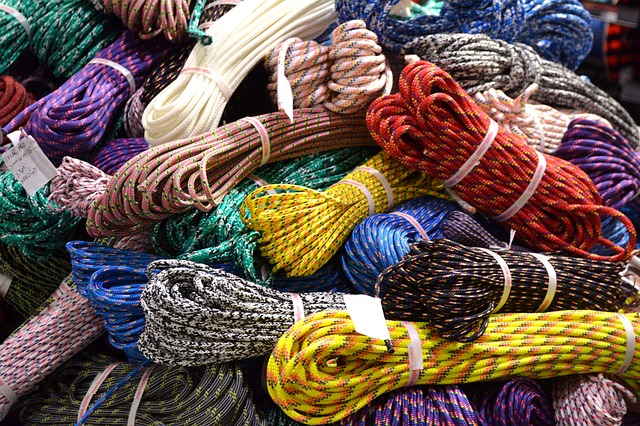
If you want a general rope that will cover most basic abseils with the option to climb too, then 50m is the length to go for.
This length will set you back anywhere between £50 to £130 depending on the level of dry proofing and thickness that you want. Good brands to look out for are Mammut and Beal, both well known for the quality and treatment of their rope, and if you’ve got an eye for a bargain then Bergzeit.co.uk is a great place to start.
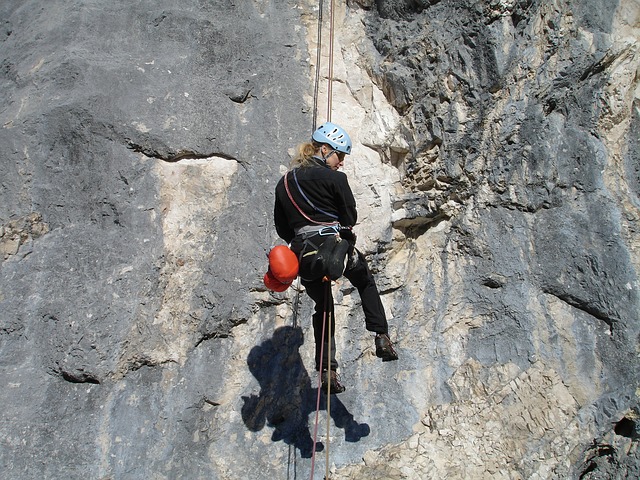
To hold your weight on the rope while you abseil you’re going to need a harness. Harnesses come in many different shapes and sizes for all types of climbing, but if you are just looking to abseil you need a simple, all round versions.
What to look for
Nearly all harnesses follow the same basic design, a waist belt, two leg loops and a belay loop. The waist belt fits around your waist, the leg loops go over your legs and the belay loop is where you attach your belay device from when you abseil.
Most harnesses also come with at least one gear loop which is where you can attach additional climbing equipment but if you’re looking for a harness purely to abseil with, you don’t really need many of these.
The most important thing when buying a harness for climbing or abseiling is that it fits comfortably. Harnesses are available in a variety of sizes and also come in men’s and women’s models so try a few before you pick one to make sure you get the best fit.
Photo: pixabay.com
A harness should fit snugly around your body without any big gaps between you and the harness and without cutting into your legs or waist. Don’t be put off by your first fitting, all harnesses are adjustable, usually with auto locking buckles that make changing the size of the waist and leg loops easy.
At the back of the harness you will also find risers which are elasticated strips that keep your leg loops in the right place. Adjusting these can make a big difference to how a harness feels so they are worth tweaking before you reject a harness as uncomfortable.
It’s a great idea to go for a harness fitting in an outdoor store like Snow and Rock. Not only will you be able to quickly get a feel for a variety of different harnesses but most big stores should also give you the chance to do a hang test. Hang tests let you sit in the harness while it’s suspended above the floor to give you an idea of what the harness will feel like when you’re using it.
Bear in mind that nearly every harness will feel uncomfortable after more than 5 minutes, but you should be able to sit with a reasonable degree of comfort, feeling fully supported, for at least a couple of minutes in the one you choose.
Where and how much?
Harnesses range from around £30 up to a couple of hundred for industrial tree surgeon set ups, but you should be able to get a comfortable starting model for around the £40 mark. Popular brands to look out for are Black Diamond and Petzl which can both be picked up at Snow and Rock or from your local outdoor store.
3) Belay Devices
Photo: wikipedia.org
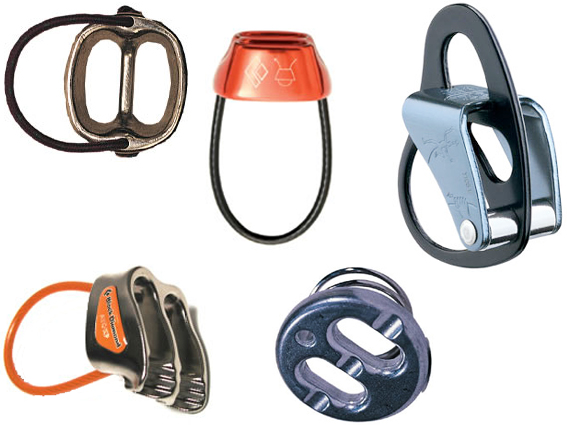
So you’ve got a rope and a harness, the next thing on your list should be a belay device. Belay devices cause friction on the rope, helping you to control the speed of your abseil to a manageable level. It also allows someone to belay you when you’re climbing up – an essential climbing skill. Again there are a wide variety of belay devices on offer, ranging from simple, one piece designs to mechanical devices with self locking mechanisms built in.
What to look for
When buying your first belay device it’s vital that you get a piece of kit that you understand, so generally speaking, the simpler the better, unless you’re trying out any particularly advanced abseiling techniques that require specialist kit.
Belay devices fall broadly into two categories, manual devices and assisted breaking devices. A manual device relies entirely upon the control of the abseiler, while an assisted breaking device has mechanical features that help you to control your speed when abseiling – or if you’re climbing, your speed when you fall off the climbing wall.
Photo: flickr.com
Manual devices are usually quite simple in design, featuring a single piece of metal which you loop the rope through and then attach both the rope and belay device to your harness with a metal clip called a carabiner.
The rope then feeds through the device quickly or slowly depending on the position of your breaking hand and how tightly you pull the rope across the device. This straightforward style is easy to use and works well with most thicknesses of rope.
Photo: camptocamp.org
Assisted breaking devices come in a much wider variety of styles but one of the most popular is the Grigri. This device, designed by Petzl, feeds the rope through a rotating cam which will pinch if there is a sudden load applied to the rope, stopping you from falling. To abseil you pull a lever which allows the rope to move through the device.
This is great in the case of a sharp slip or fall but can sometimes be complicated to set up and use for inexperienced abseilers. You also need to make sure you are using a thickness of rope that works well with any assisted breaking device.
Some people might feel safer with an assisted locking device like the Grigri. They are not 100 per cent fool proof and still require careful attention to operate properly, but if you feel confident using it then assisted models could be for you. Most climbers and abseilers however, start with a manual device which provides a simple and accessible way to start abseiling.
Where and how much?
For manual devices look out for brands including Wild Country and Black Diamond, while Petzl and Mammut are among the popular names in assisted breaking. Prices range from as little as £10 up to around £20 for a manual device and assisted versions can cost between £40 to £80 a pop. Check out trekkinn.com for some great prices on both types of device.
4) Accessory Cord
Photo: gooutdoors.co.uk
A piece of cord can have lots of uses for outdoor athletes from replacing a broken shoelace to attaching equipment to your pack, but in abseiling this simple piece of kit can be an essential part of your safety gear too.
What to look for
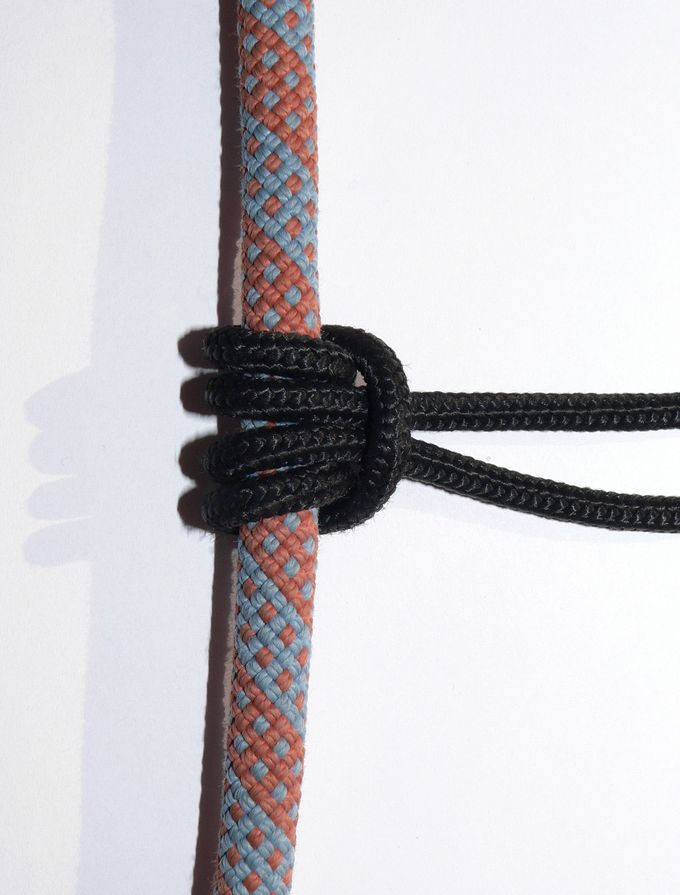
No matter how good your climbing equipment is, it’s always a great idea to have a backup, and a piece of durable cord can be used to create an extra level of safety to any belay device by tying a prusik knot.
The prusik is a friction knot which is designed to tighten around the rope when weight is applied to it. The prusik is attached with a locking carabiner to your leg loop and then to the rope which means that if you let go of the rope or have an accident with your belay device the prusik will kick in, tightening onto the rope and stopping you from falling.
Using the knot is simple too, all you have to do when you’re abseiling is slide the prusik along the rope with your lower hand as you abseil down.
Photo: wikipedia org
Cord for a prusik knot is usually between 5mm and 7mm thick and you should be looking for around a meter in length. The other thing to think about is the melting point of the cord because friction on the rope will generate heat, so a higher melting point should ensure that your prusik lasts longer without damage. Nylon based cord is a good bet with a melting point of more than 200C.
Where and how much?
Decent cord is pretty easy to come by, but if you want a name you can trust delivered straight to your door then visit gooutdoors.co.uk where you can grab a meter of 6mm Mammut accessory cord for just 90 pence.
5) Climbing Rope Protector
Photo: adventurejay.com
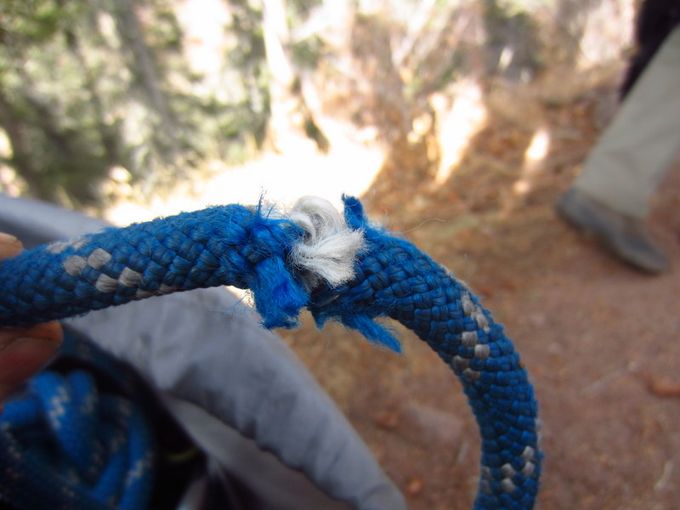
When you’re abseiling you need to keep all of your gear in as good condition as possible and check it regularly to make sure that it’s not damaged before you use it. Thankfully when it comes to ropes there is a special piece of equipment just for keeping them in good nick.
When abseiling, your ropes will start to deteriorate through friction as they rub on anchors and rough surfaces that you’re abseiling down. This problem is particularly bad when the rope is pressed down along the lip of cliffs and buildings, but this is where rope protectors come in.
What to look for
Rope protectors come in a variety of styles but they are all designed to protect your rope from contacting the rough edge at the top of whatever you are abseiling down.
At the simplest end of things a rope protector can be nothing more than a piece of mat or carpet which is laid over the lip and attached securely to stop it from falling over the edge. There are professional canvas and plastic versions available but a sturdy piece of doormat from your local carpet suppliers could work just as well.
Photo: abacus-ise.co.uk
Another common type of rope protector is the sleeve style. These slip over or wrap around the rope providing a protective outer cover for your abseiling line. Brands such as Mammut, DMM and Spiroll are well known for this type of covering but again this is easy to make a home made version of. Using a piece of garden hose with spiral cut running down it should grip to most types of rope providing a reasonably cheap and effective form of protection.
Photo: Petzl.com
Finally you have step systems which sit in place between the rope and the edge, providing a smoother running surface for your abseiling rope. Systems like these include edge rollers which slot on to the lip of your descent with an aluminium roller to reduce friction. Petzl also have a model called the Caterpillar which looks like a small ladder and uses a set of metal rungs to guide the rope with minimal friction.
Where and how much?
If you do not want to go for one of the home made options you can end up paying anything from £10 for a sleeve protector up to almost £200 for an industrial level edge roller. As a simple standby you can grab a sleeve style DMM rope protector from abacus-ise.co.uk for under £10.
6) Climbing & Abseiling Helmet
Photo: pixabay com
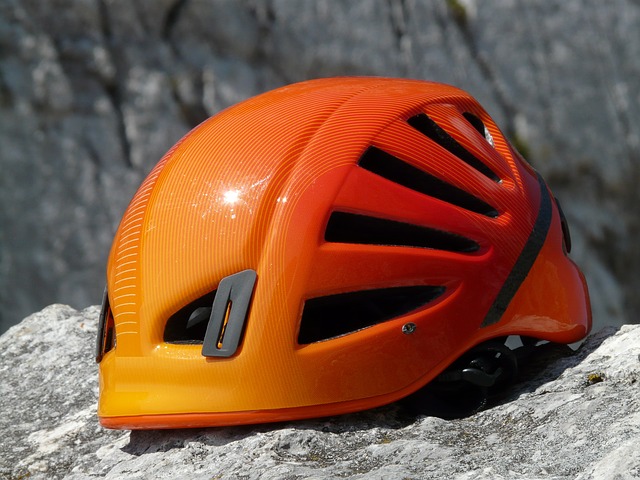
Gone are the days of boring and boxy looking helmets, head protection for climbing and abseiling now comes in a variety of lightweight styles that you almost won’t know you’re wearing. A helmet is a wise choice when you’re abseiling as it protects you from both bumping your head and falling debris too.
What to look for
There are three main types of climbing helmet, hard shells, hybrid and superlight helmets.
Hard shell helmets feature a heavy polycarbonate shell with webbing inside the helmet to absorb impacts. This design is tough and durable but heavy. As a result they have largely fallen out of fashion in favour of lighter models, but can still be found at many outdoor pursuits centres and climbing walls.
Photo: Petzl.com
Hybrid helmets use a mid thickness plastic shell with expanded foam inside to cushion your head. They are lighter than hard shells and are a good all round style to go for.
Superlight helmets have a thin polycarbonate shell, again over an expanded foam interior. These are the lightest helmets available but they’re the most expensive too.
Most models of helmet come in a range of sizes and have a great deal of adjustability too with chin straps, side straps and headband adjustment essential for getting the perfect fit. Finding a comfortable helmet is down to your personal judgement but when it’s on properly a helmet should sit centrally on your head without wobbling or causing pressure in your temples while the chin strap should fit snugly but not cut into your chin.
Where and how much?
One word of advice, don’t buy second hand helmets. A single hard blow can be enough to render a helmet useless and it’s not always easy to tell from the outside what damage may already have been done to a second hand lid.
Price wise you’re looking from about £25 for a hard shell up to around £75 for a top end superlight helmet. Right now you can grab a popular hybrid style, Petzl Elios for around £32 from Trekkinn.com.
7) Carabiners
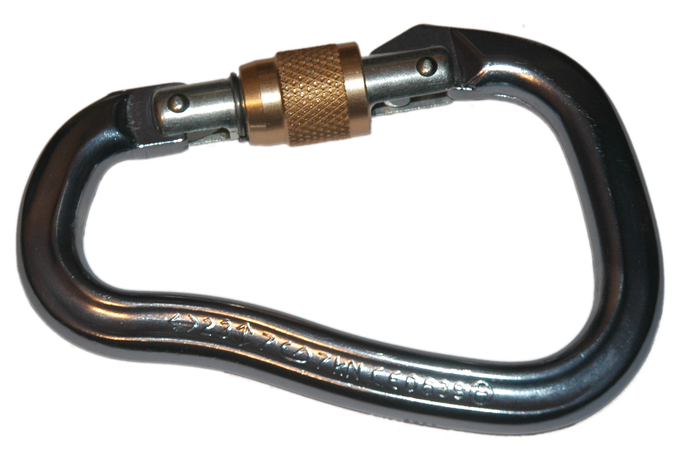
Photo: wikipedia.org
Carabiners are the metal clips that you see all over the place in climbing. They’re used to attach things together, kit to your bag, protection to your harness and your rope into protection. They’re a relatively cheap but important part of your rock climbing and abseiling gear.
What to look for
Carabiners come in three main shapes, oval, D shaped and asymmetrically D-shaped and each style has a spring loaded gate in one side.
Photo: wikipedia .org
Oval shaped carabiners are the older style, they are not quite as strong as D shaped carabiners but they are good for carrying gear. D shaped carabiners are stronge carabiner and are easier to clip on to things because of their shape. Lastly asymmetrical carabiners are lighter and even easier to clip than regular Ds because they have a wider gate.
When buying a carabiner you should look for is a locking model. Regular carabiners just push open and then spring closed but locking carabiners have an additional feature that makes sure the clip won’t spring open again until you want it to. Sudden falls or slips can result in something called gate lash where your carabiner springs open momentarily and even brushing against hard rocks etc. has a chance of pushing open a regular carabiner. For this reason locking carabiners are a must for climbing and abseiling because the last thing you want is your belay device coming off in the middle of a climb – or a descent.
Photo: wikipedia.org
Locking carabiners are heavier than regular carabiners and come in both manual and self locking designs. Manual locking carabiners have a cuff that you screw by hand to lock the gate shut while self locking designs usually have a spring loaded cuff that pops up when you close the gate and needs to be pulled down again before you can reopen the clip. This makes them quick to use but you need to make sure they are fully closed before you climb or abseil with them. You can also get hybrid systems that combine both manual and self locking features and there’s a new model of twin gated carabiner, released in 2014 by Grivel, which offers the ease of use of a regular carabiner with the security of a self locking device.
Where and how much?
When buying a carabiner it’s important not to be drawn in by super cheap models that cost around £3 or sometimes less. These are often just decorative clips used as key ring holders etc. If you are buying online make sure you go with a recognised brand like Black Diamond or Petzl or pop into your local outdoor store and get some advice from staff about the best locking models they have for abseiling.
Manual locking carabiners start from around £7 while autolocks are usually priced at £10 and up. You can pick up a manual Black Diamond Airlock Screwgate carabiner for just under £7 from exxpozed.com.
8) Protection
Photo: wikipedia.org
In abseiling an anchor is the place where you secure your rope at the top of a drop. Anchors can be natural, like rocks and trees or man made like an abseil bolt at the top of a building.
At established outdoor abseil and climbing sites there’s often metal loops drilled into the rock or stakes in the ground from which you can anchor but before using any of these it’s vital to check them thoroughly, making sure they’re not worn through or loose. If there’s any doubt, don’t use them.
You may sometimes find yourself in a spot where there’s no natural anchor point or any man made anchors that you trust, so for this reason it’s always a good idea to carry equipment with you for making your own anchor point.
What to look for
Thankfully there are easier ways to create an anchor point than carting a giant metal stake and a sledge hammer everywhere with you. There are lots of different lightweight devices you can use to secure your rope to the rock and collectively they are known as protection, sometimes abbreviated to ‘pro’.
Protection comes in many different shapes and sizes but there are two main types, passive protection and active protection.
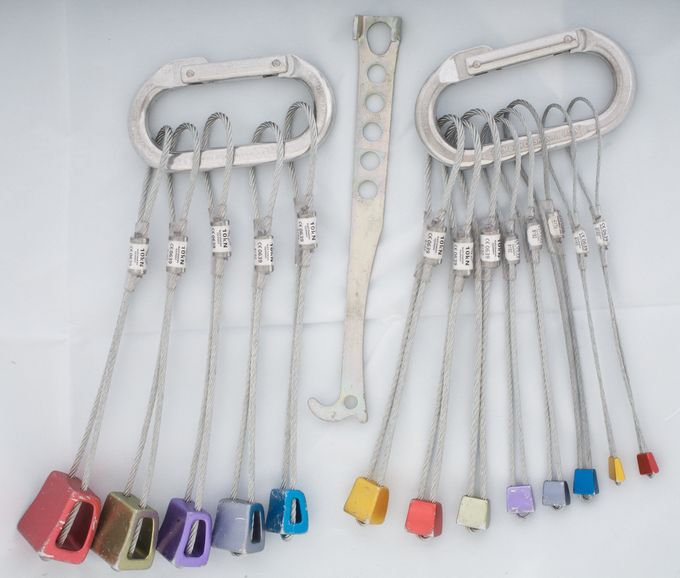
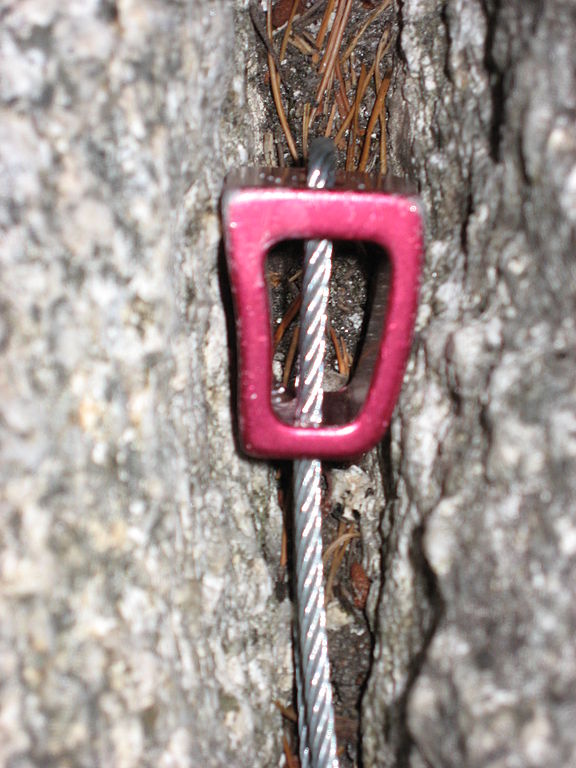
Photo: wikipedia.org
Passive protection consists of single pieces of metal attached to a loop of wire which you can then clip carabiners onto. The most common form of passive protection is known as a nut or stopper. It’s shaped like a wedge and slides into cracks in the rock where it jams to form an anchor point. Because passive protection is made of a single piece of metal it’s very strong, durable and easy to place.
The downside is that you need to find a crack in the rock around that narrows in order for the wedge shape to work and you might need to carry a large range of nuts so that you’ll have the right sized wedge to fit the cracks that are available.
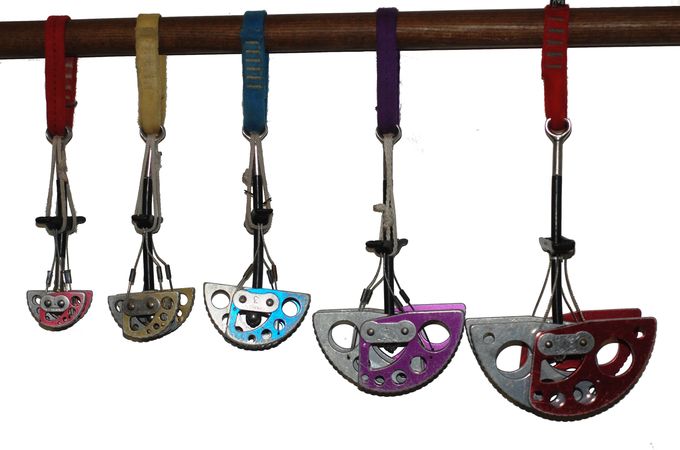
Photo: wikipedia.org
Active protection also features a loop of wire for clipping on to but it uses a mechanical head to create friction with the rock instead of a wedge shape like in passive protection. The most common type of active protection is a cam which has a series of spring loaded ‘lobes’ that are pulled in with a trigger so they can slide into a gap. When the trigger is released, the lobes spring out, gripping the rock inside the gap.
Photo: wikipedia.org
Because it’s mechanical, active pro is more expensive and also more fragile than passive protection. However, it’s also more versatile because one piece is able to fit a larger number of cracks and the gear is lighter too.
Whenever you’re building an anchor it is important to back it up, making sure that the rope is attached to at least 2 or 3 different pieces of protection. This means that if one fails you should still be held securely by your backups. To ensure that you can always backup it’s a good idea to have a range of different types of protection so that you have the best chance of creating secure anchors on any rock face.
Where and how much?
Nuts can set you back around £5 each with a good starter set beginning at about the £40 mark. A single cam comes in at almost £50 with sets starting nearer £100. Black Diamond and DMM are popular names to watch out for and elitemountainsupplies.co.uk offer some great deals on all ranges of protection.
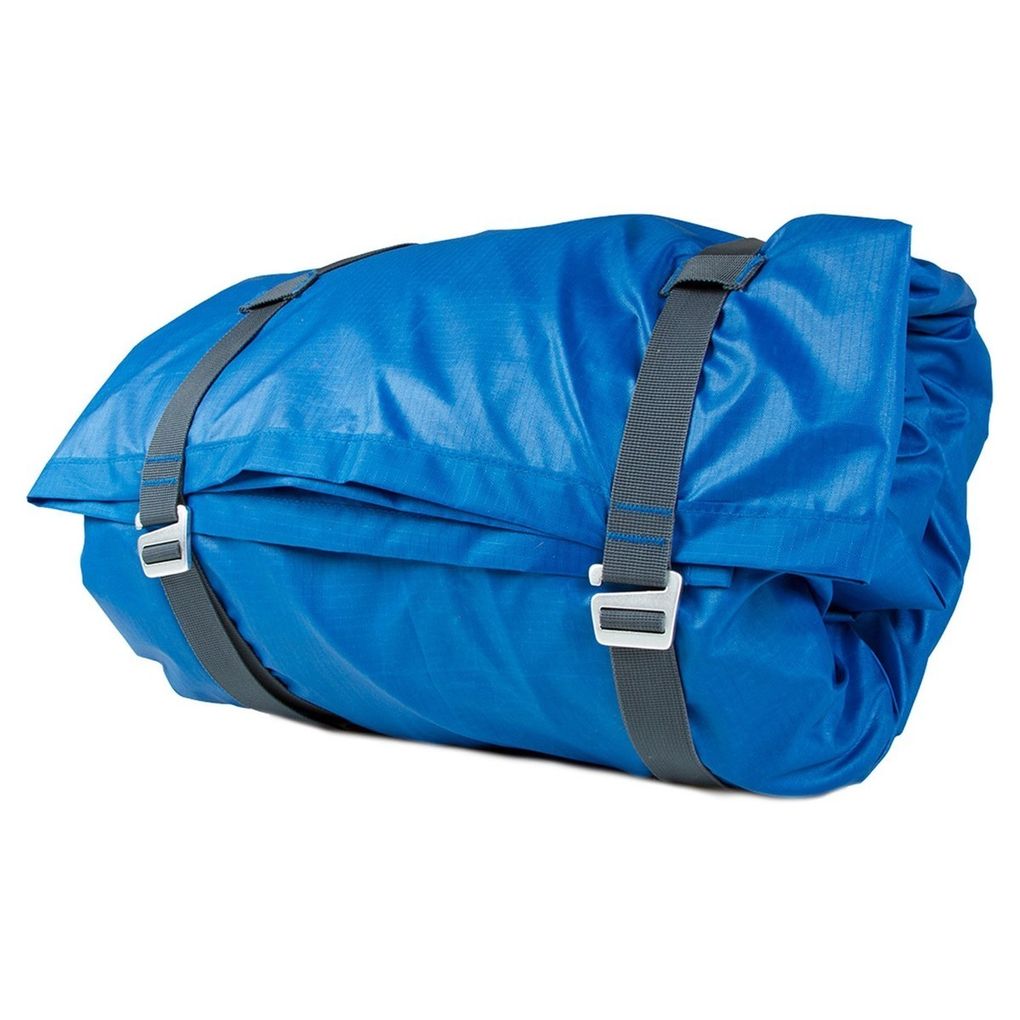
9) Rope Bag
Photo: tauntonleisure.com
When you’re climbing or abseiling you’ll be lugging around ropes quite often so it’s a great idea to have a way of doing that which is both comfortable and practical.
What to look out for
As with everything else on this list, rope bags come in more shapes and sizes than you could shake a carabiner at but there are some key features you should look out for in any potential sack.
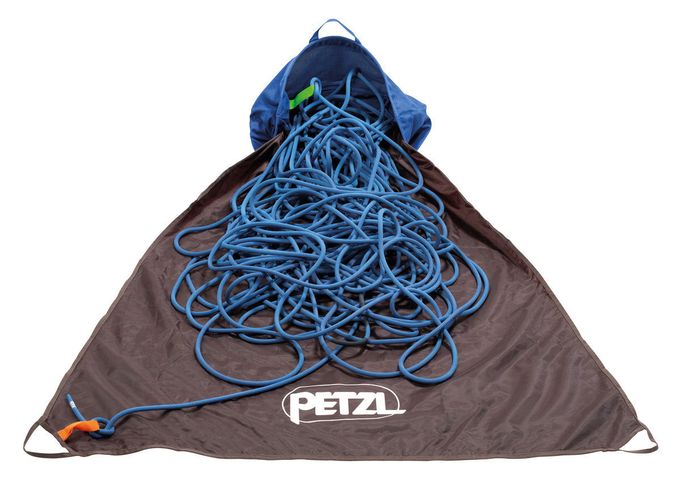
A real rope bag always comes fitted with tarpaulin which you lay out on the ground to stop your rope getting wet or dirty as you prepare it or pack it away after abseiling. In some cases this tarp is fitted inside the rope bag while in other the bag itself is essentially one big tarp which folds out when you’re using it and then back into a bag shape for carrying.
Photo: petzl.com
Make sure that any bag tarp is big enough for the rope or ropes you’re carrying but usually around 4ft by 4ft is a good size. The tarp should also have good water resistance to stop damp getting through to your rope. This might sound a bit fussy but wet rope is heavy and difficult to handle. If your rope gets wet and dirty it can also reduce it’s life span over time and it will add extra wear to other bits of kit like your belay device.
Rope bags come with a variety of strap styles, from over the shoulder to back-pack, so think about what else you might be carrying and which style you will find most comfortable. You also want to look out for pockets to carry items like protection or your car keys which could save you having to take an extra bag for your other gear.
Photo: rockrun.com
Finally look for anything on the bag that makes it simpler to pack away like compression straps or tie in loops on the tarp. Extra features like this can save you quite a bit of time and make the whole process of abseiling much easier.
Where and how much?
Rope bags can cost anywhere from £20 to £60 or more. A great starting model is the DMM Classic Rope Bag. It’s got a decent sized tarp with tie in loops, extra carrying pocket and a variable strap system which makes it easy to carry. You can get one from tauntonleisure.com for around £32.
10) Climbing & Abseiling Guidebook
Photo: Flickr.com
A guidebook is a great way to find outdoor climbing spots or the best places to try abseiling. You might already know about some local drops but it’s always good to have a bit of variety and you’d be surprised by how many stunning places there are to slide down a rope in the UK.
If you’re heading down to a nearby crag there’s always the chance that it’s too busy or maybe the weather isn’t ideal for your first choice of route, this is where a guidebook comes in handy to provide an alternative.
Most people would probably jump on their phone but the beauty of a guidebook is that it works even when there’s no phone signal which, let’s face it, can be pretty common in the isolated spots you’re likely to find yourself climbing in.
The idea of a carrying a book around might also seem a bit old school if you’re packing the latest E-reader, but when you’re heading down to a crag, chances are a real book is going to survive bumping on rocks and a spot of water much better than an expensive Kindle.
What to look for
Photo: UKClimbing.com
There are plenty of great online resources for finding somewhere to abseil, so there’s nothing to stop you doing a bit of research and printing out a home made guidebook of the local area or wherever you fancy heading off for a spot of abseiling.
The trick here is not to Google abseiling but instead climbing routes. Abseil searches will more often than not result in charity events or training courses, rather than somewhere to do it yourself.
All good climbing routes need a solid place to anchor, and usually have some stunning views, so a good climbing route will nearly always be a good abseiling route too.
Climbs are listed individually at UKC and often have useful descriptions letting you know the type of protection on each route and the sort of rock you’ll be abseiling down.
Photo: rockfax.com
If you’d prefer someone else to do all that tedious printing work for you, the go to publication is Rockfax. This guide series has a different book for each area of the UK featuring detailed descriptions and photos of the routes and rock along with advice about how to best approach them.
Where and how much
You can grab a copy of Rockfax from the official website rockfax.com for about £30, but there are also some good deals on the Rockfax range at online book seller Wordery.com.
We use cookies on our website to give you the most relevant experience by remembering your preferences and repeat visits. By clicking “Accept All”, you consent to the use of ALL the cookies. However, you may visit "Cookie Settings" to provide a controlled consent.
This website uses cookies to improve your experience while you navigate through the website. Out of these, the cookies that are categorized as necessary are stored on your browser as they are essential for the working of basic functionalities of the website. We also use third-party cookies that help us analyze and understand how you use this website. These cookies will be stored in your browser only with your consent. You also have the option to opt-out of these cookies. But opting out of some of these cookies may affect your browsing experience.
Necessary cookies are absolutely essential for the website to function properly. These cookies ensure basic functionalities and security features of the website, anonymously.
Cookie
Duration
Description
cookielawinfo-checkbox-analytics
11 months
This cookie is set by GDPR Cookie Consent plugin. The cookie is used to store the user consent for the cookies in the category "Analytics".
cookielawinfo-checkbox-functional
11 months
The cookie is set by GDPR cookie consent to record the user consent for the cookies in the category "Functional".
cookielawinfo-checkbox-necessary
11 months
This cookie is set by GDPR Cookie Consent plugin. The cookies is used to store the user consent for the cookies in the category "Necessary".
cookielawinfo-checkbox-others
11 months
This cookie is set by GDPR Cookie Consent plugin. The cookie is used to store the user consent for the cookies in the category "Other.
cookielawinfo-checkbox-performance
11 months
This cookie is set by GDPR Cookie Consent plugin. The cookie is used to store the user consent for the cookies in the category "Performance".
viewed_cookie_policy
11 months
The cookie is set by the GDPR Cookie Consent plugin and is used to store whether or not user has consented to the use of cookies. It does not store any personal data.
Functional cookies help to perform certain functionalities like sharing the content of the website on social media platforms, collect feedbacks, and other third-party features.
Performance cookies are used to understand and analyze the key performance indexes of the website which helps in delivering a better user experience for the visitors.
Analytical cookies are used to understand how visitors interact with the website. These cookies help provide information on metrics the number of visitors, bounce rate, traffic source, etc.
Advertisement cookies are used to provide visitors with relevant ads and marketing campaigns. These cookies track visitors across websites and collect information to provide customized ads.
Other uncategorized cookies are those that are being analyzed and have not been classified into a category as yet.
Newsletter Terms & Conditions
Please enter your email so we can keep you updated with news, features and the latest offers. If you are not interested you can unsubscribe at any time. We will never sell your data and you'll only get messages from us and our partners whose products and services we think you'll enjoy.


